In order to safely analyze malwares, the very first step is to setup a lab. I’ve read multiple articles about it but I’ve decided to write my own guide compiling all the small details that were important to me. This guide is for beginners and I hope it can help someone starting his journey into malware analysis.
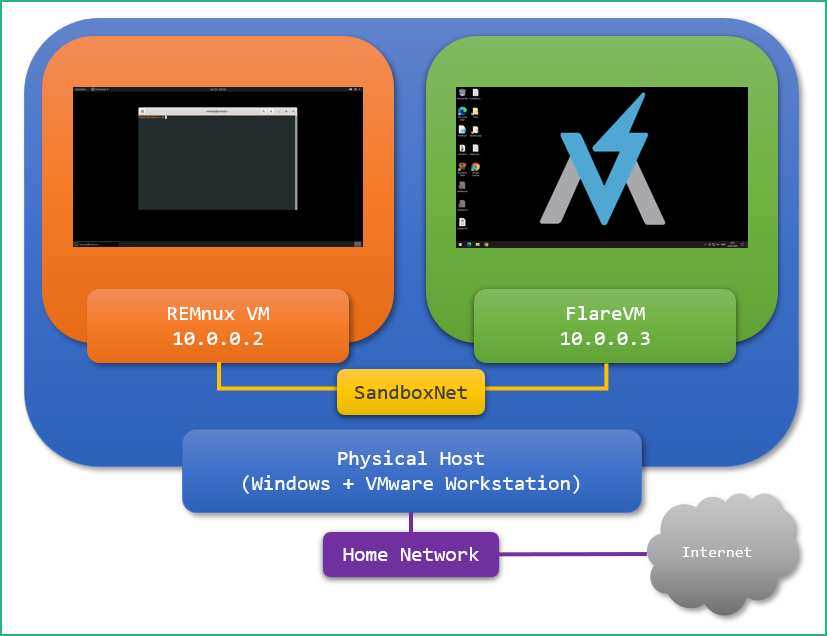
The idea is to install and use some Virtual Machines (VMs) on a Virtual Network (in order them to communicate), everything being isolate as much as possible from the physical host. There are several possibilities to do that, but my preferred way is to use Windows as operating system and VMware Workstation Pro as hypervisor. I know that VirtualBox is free and can also be used but I highly prefer the stability of VMware Workstation Pro. We can download and use the Trial Version but after 30 days we’ll have to buy it for a reasonable price (199$) or to use Google efficiently.
Be aware that some exploits are capable to escape from the VMs and contaminate the host/hypervisor, it is recommended to dedicate the physical host for the lab and to not store any sensitive/personal data on it. However, it’s not always easy to have a dedicated powerful machine dedicated for this, and with up-to-date software, VM escapes are pretty rare (if you want to analyze such exploits, I guess you don’t have to ready this guide anyway).
Update 30/01/2023 : Added 0x34 – Debloating Windows
0x10 – Installing and Configuring VMware Workstation Pro
0x20 – REMnux
0x21 – Install REMnux
0x22 – Configure REMnux
0x30 – FlareVM
0x31 – Install Windows VM
0x32 – Configure Windows VM
0x33 – Install FlareVM Tools
0x34 – Debloating Windows
0x35 – Post Installation Network Config
0x40 – Final Words
0x10 – Installing and Configuring VMware Workstation Pro
Download the trial version of VMware Workstation Pro and install it on your host. Note that Virtual Machines will be stored in a place of our choice, not necessarily on the same drive as where the hypervisor is installed.
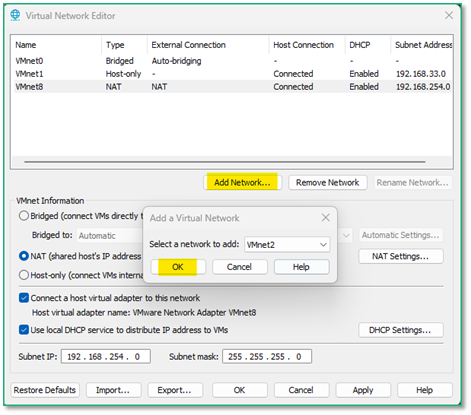
Once installed, we’ll need need to setup a dedicated Virtual Network, isolated from our host machine, for our VMs to communicate.


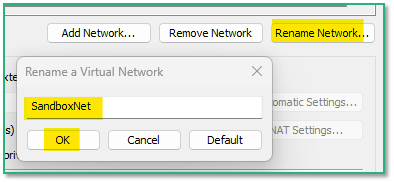
For easier identification when we’ll configure our VMs, we’ll rename the Virtual Network to “SandboxNet”.
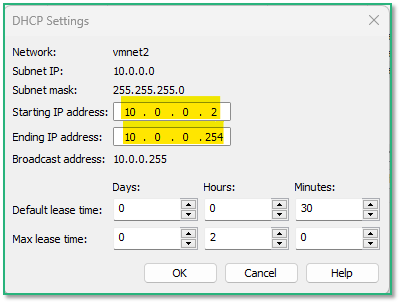
Now we’ll configure SandboxNet to be a host-only network and to enable the DHCP server.
There is no need to connect any host virtual adapter to this network (the Shared Folders feature will still work even if this is enabled).
We also define a IP range that is different from our host local network (typically 192.168.something in a home/personnal environment where the Internet box acts as DHCP server) to avoid any confusion.

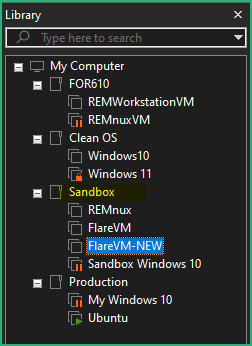
In the Library panel on the left, I recommend to create a new folder for the VMs that will be used in the lab, just for easier management.
Note that this is a logical view, it has no impact on where the VMs will be stored.
Everything is now ready to install our VMs.
0x20 – REMnux
REMnux is a Linux distribution based on Ubuntu but with specific tools for malware reverse engineering (REM). It’s fast, free and lightweight. It contains all the tools we’ll need to start with malware analysis, even for Windows malwares and Microsoft Office maldocs ! (Lenny Zeltser is behind this distro, he’s also the author of the SANS FOR610 course).
Detailled installation steps can be found on the installation page but we’ll try to describe them in this guide also.
0x21 – Install REMnux
There are several to install REMnux but we’ll go for the easiest way, using a Virtual Appliance.
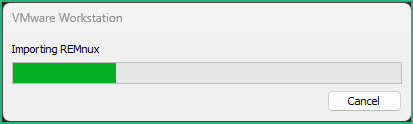
First steps are : Download / Verify / Import OVA / Upgrade

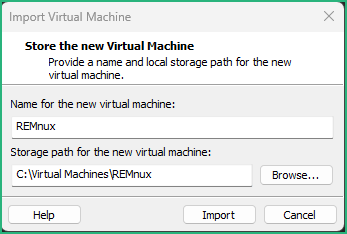
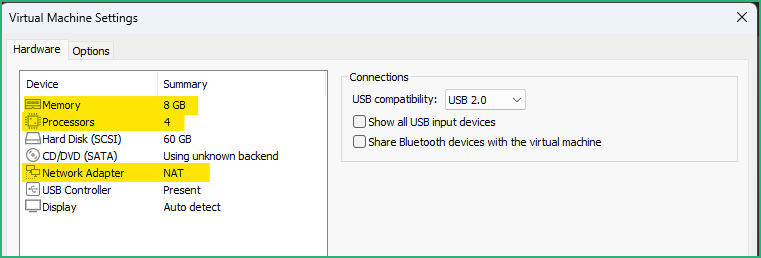
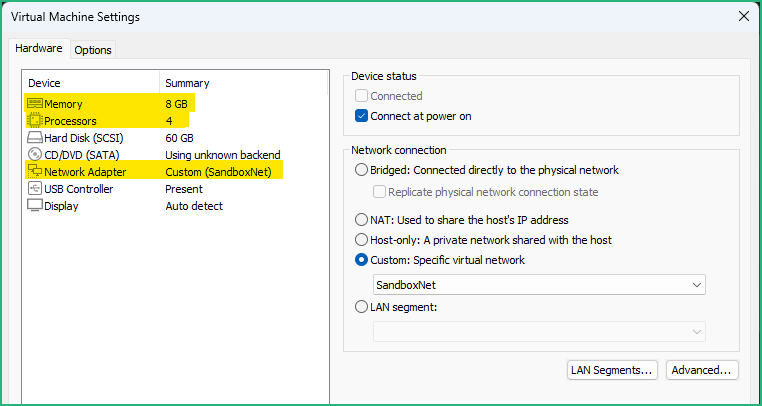
Now the VM is visible in the Library, drag & drop it to the Sandbox folder we created earlier. To be comfortable and if you have a powerful enough host, I recommend to boost the VM with 8GB memory and 4 cores. Keep your VM in the NAT network for the moment as we’ll need Internet connection to upgrade it :
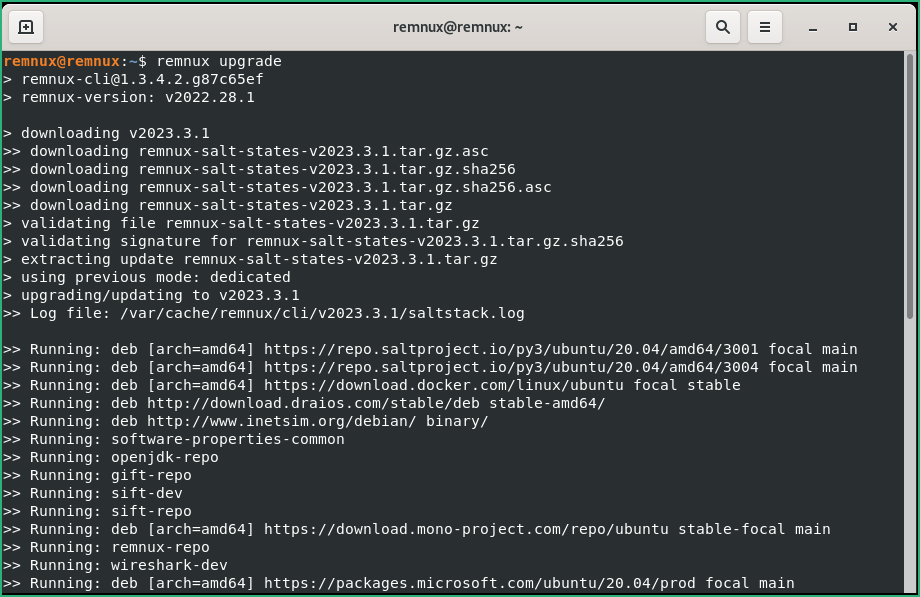
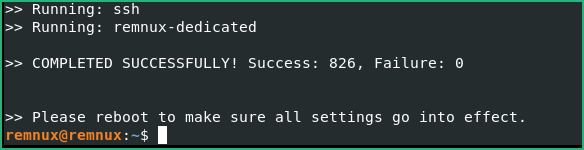
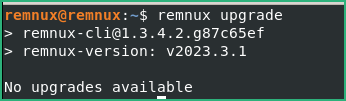
Start the REMnux VM, a shell will open. If you need to change the keyboard layout to match your keyboard : follow this. Now type remnux upgrade to upgrade our REMnux with new and updated packages.
0x22 – Configure REMnux
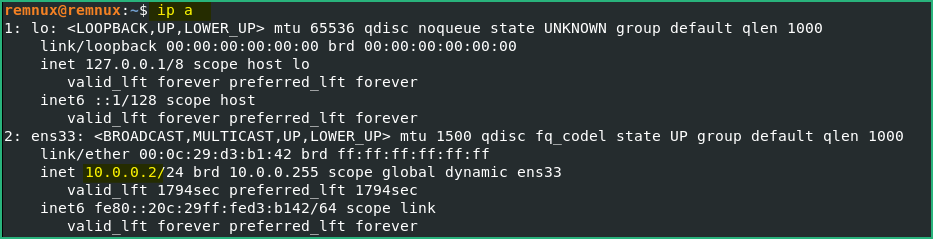
Now that our REMnux VM is up to date, we can put it the SanboxNet Virtual Network
For Malware Analysis, we’ll often need to emulate a DNS server, for example to discover which domain(s) the malware is trying to connect to.
To do this, we’ll configure INetSim to also reply on DNS requests. Edit the configuration file with : sudo pico /etc/inetsim/inetsim.conf
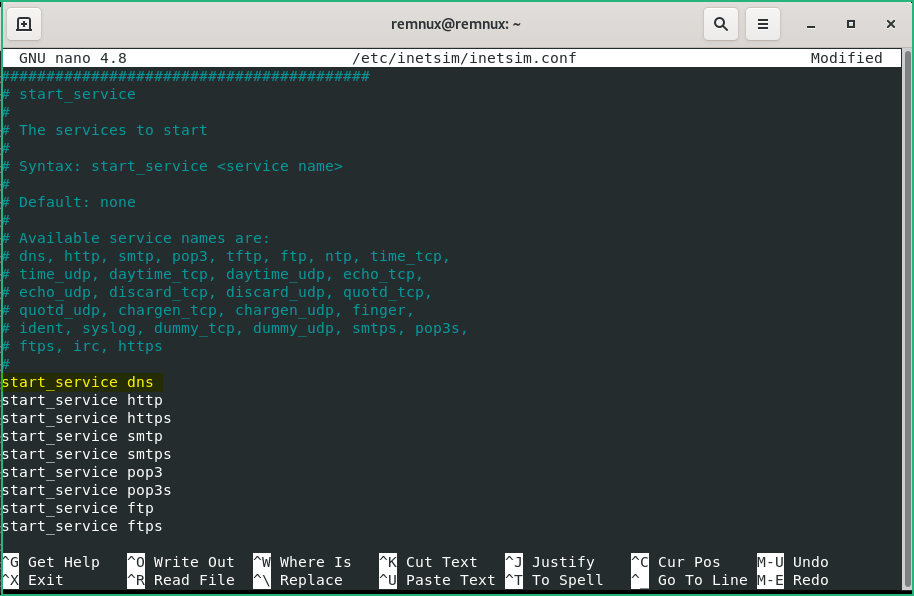
start_service dns in /etc/inetsim/inetsim.conf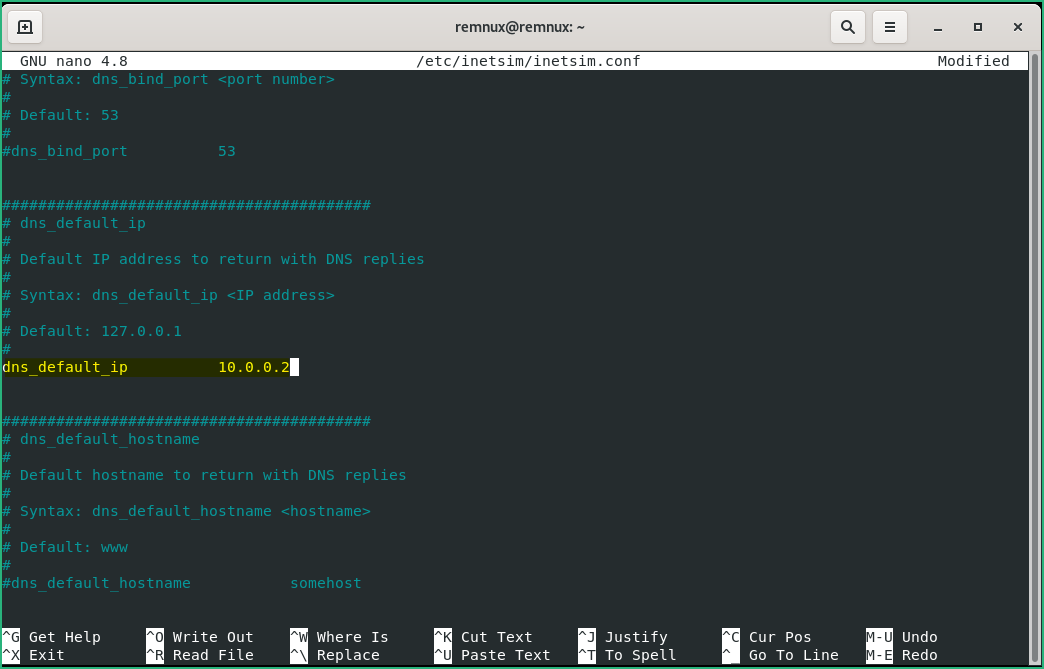
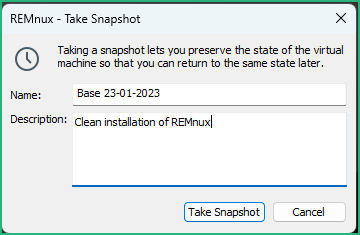
dns_default_ip and update it with your current IP address. Exit + Save.Last but most important, shutdown the VM and take a Snapshot :
0x30 – FlareVM
FlareVM is a set of scripts that will install tools needed for malware analysis over a Windows 10 VM. It uses internally Chocolatey and Boxstarter. Once installed, all the tools can be upgraded with a simple command, no need anymore to worry about updating them manually ! The company behind FlareVM is Mandiant, acquired by FireEye in 2013, and eventually by Google in 2021. Detailled installation steps can be found on FlareVM Github but we’ll try to describe them in this guide also.
FlareVM is free, Windows 10 is not, but luckily it can be installed over a trial version for testing purpose.
If you’re already running Windows, you can create your own ISO file using the MediaCreationTool22H2.exe or you can fake your User-Agent to download it directly.
Another options is to download an existing ISO here or here at your own risk.
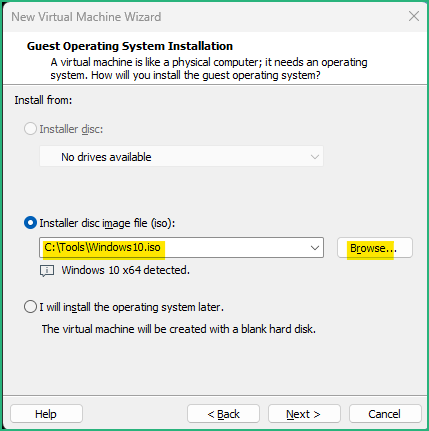
Once we have an ISO file ready, we can move one with creating the VM.
0x31 – Install Windows VM
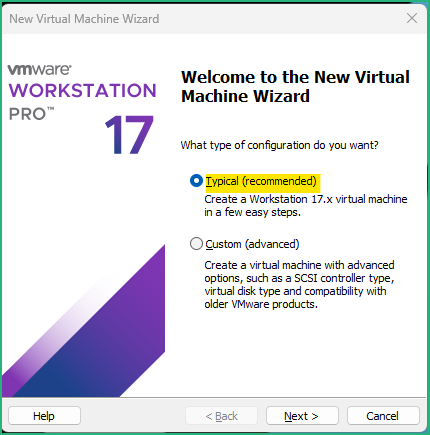
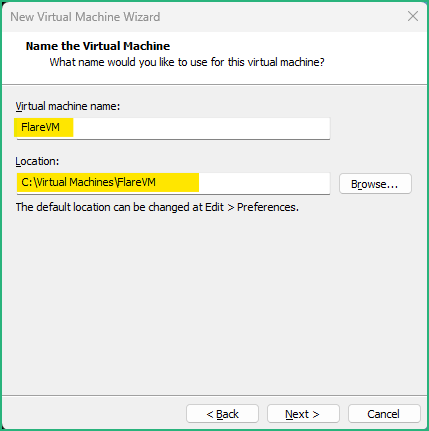
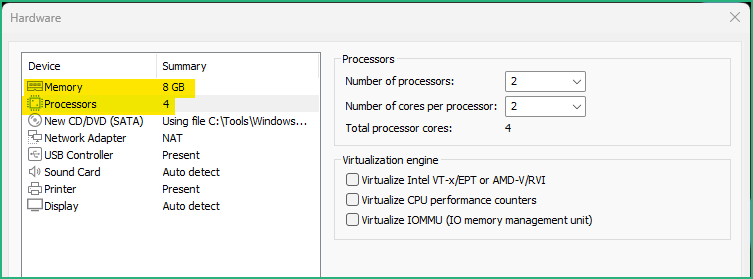
In VMware, create a new Virtual Machine (Ctrl-N) :
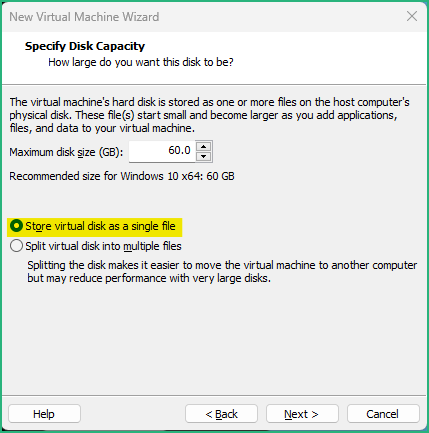
Just like for the REMnux, if your physical host is powerful enough, I recommend to boost your VM to 8GB memory and 2 processors with 2 cores each (4 in total). Keep the VM in the NAT network as we’ll need to upgrade it and install FlareVM from Internet.
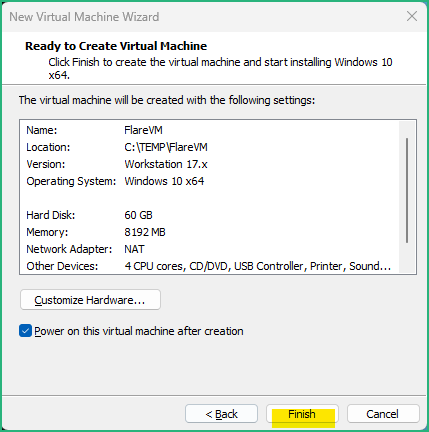
The Windows VM will now boot and Windows will be installed.
During the installation, choose an “Offline Account” with “Limited Experience”, and pick a simple username without any space (I use “Analyst”) to avoid any problem later.
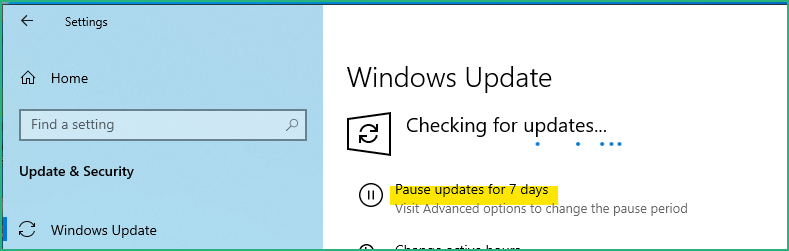
Once installed, make sure VMware Tools and Windows updates are installed.

Configure your Windows as you like (keyboard layout, icon size …).
At this stage you can already take a first snapshot of the VM in case a later operation fails.
0x32 – Configure Windows VM
Windows is now installed and updated. Before installing FlareVM, we need to :
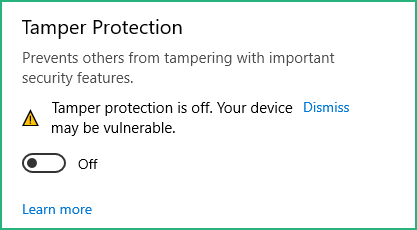
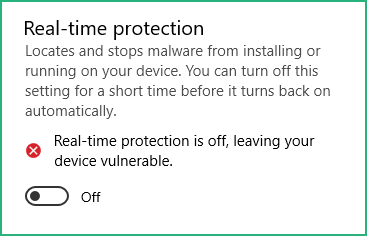
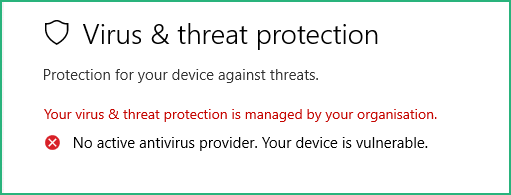
As we’ll use this VM to analyze malware samples we also need to deactivate Windows Defender, the easiest way is to :
Go to Settings / Update & Security / Windows Security / Virus & threat protection and :
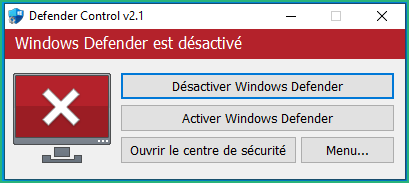
Then download Defender Control from Sordum on your Windows VM and run it :

0x33 – Install FlareVM Tools
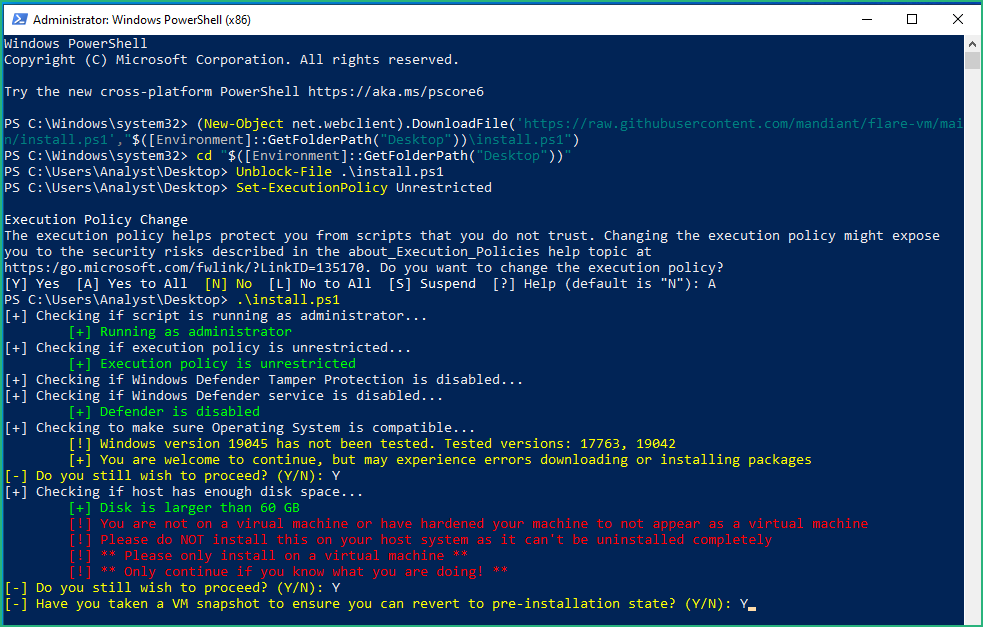
Open a Powershell Window as Administrator and type the 5 commands :
(New-Object net.webclient).DownloadFile('https://raw.githubusercontent.com/mandiant/flare-vm/main/install.ps1',"$([Environment]::GetFolderPath("Desktop"))\install.ps1")
cd "$([Environment]::GetFolderPath("Desktop"))"
Unblock-File .\install.ps1
Set-ExecutionPolicy Unrestricted
.\install.ps1
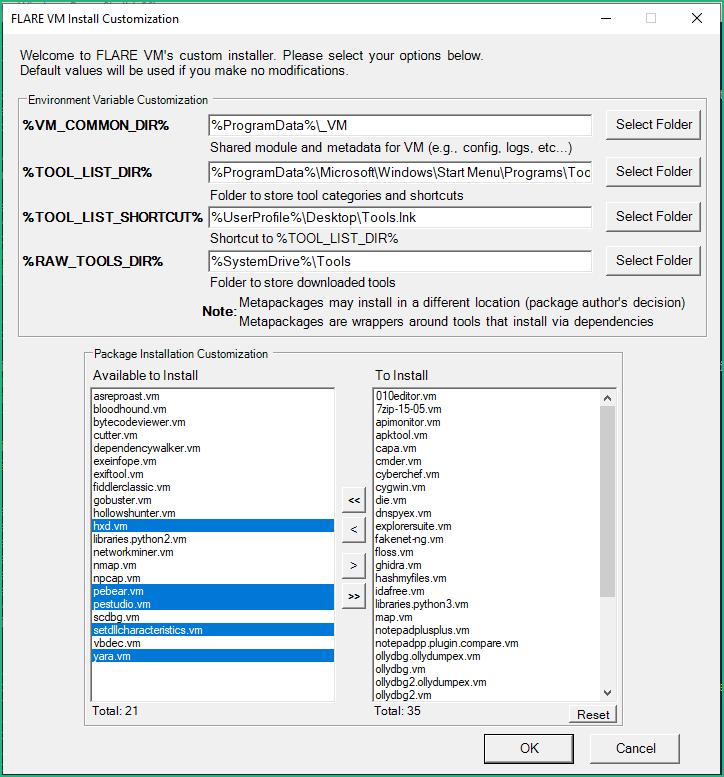
A GUI should now show up, asking us to confirm some settings. Personnally I keep the directories by default but I install additional packages (we can also choose to install them all !).
Installation of all the packages takes quite some time, and the VM will reboot on his own … Just let it go …
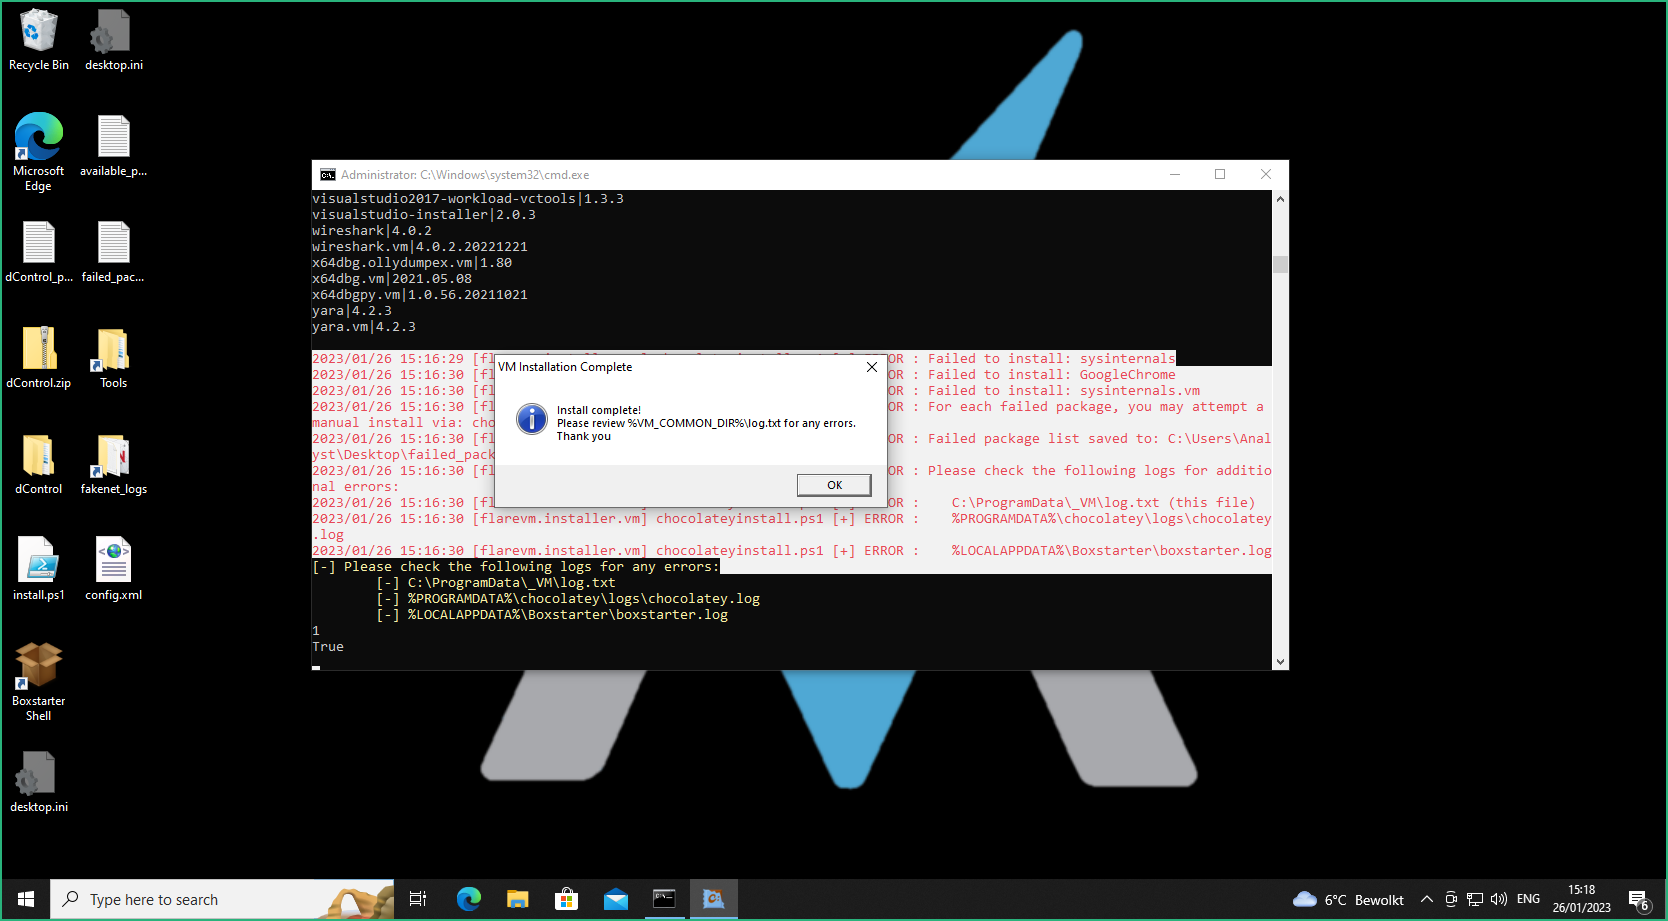
Some packages may fail to install, no worries we can still try to install them manually by running choco install <package> in a command prompt. Here I use cmder as command prompt, but Windows Terminal works fine as well.
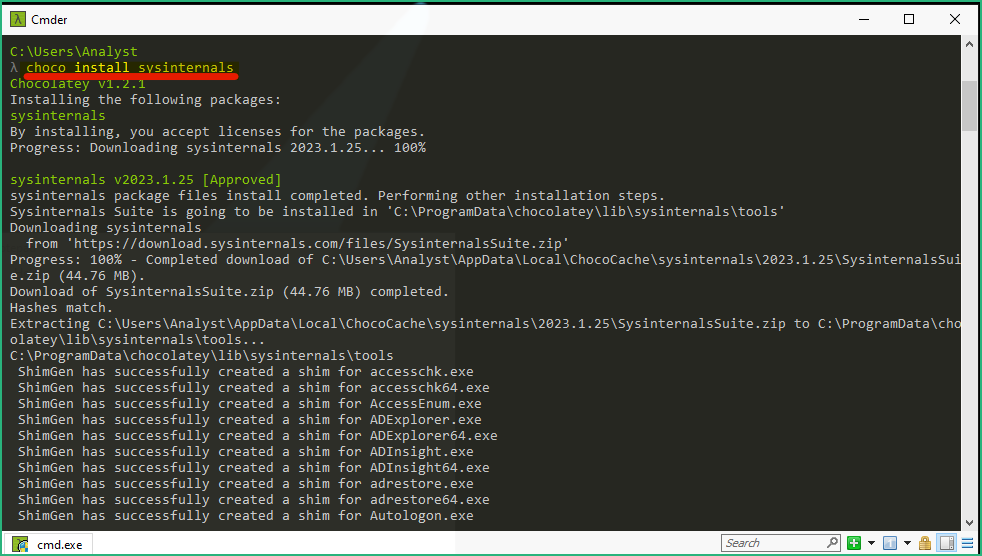
choco install sysinternals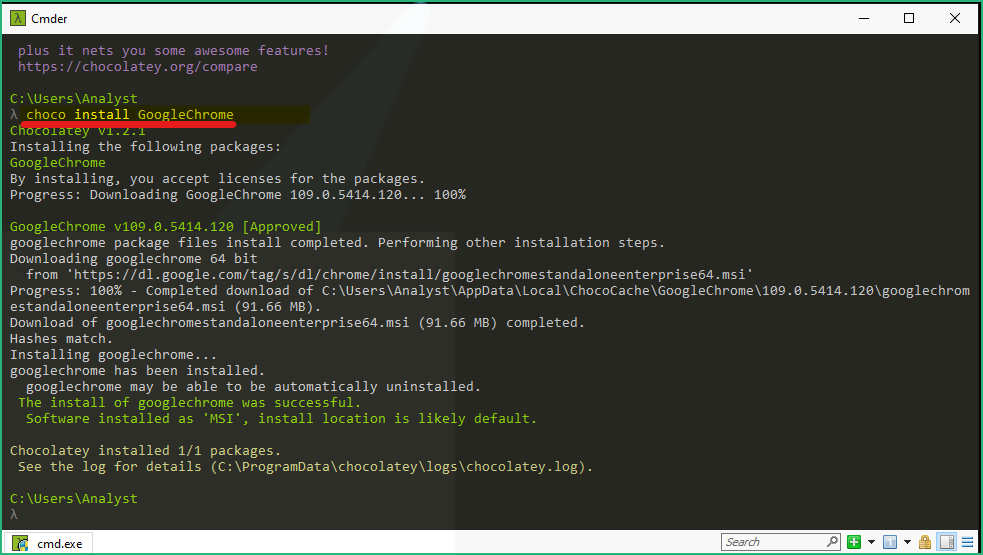
choco install GoogleChromeAll packages are now installed and tools are accesible from the “Tools” folder on the Desktop !
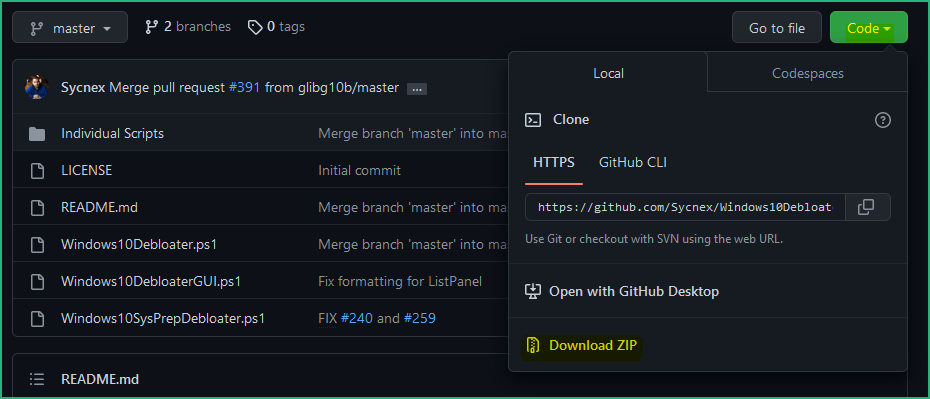
0x34 – Debloating Windows
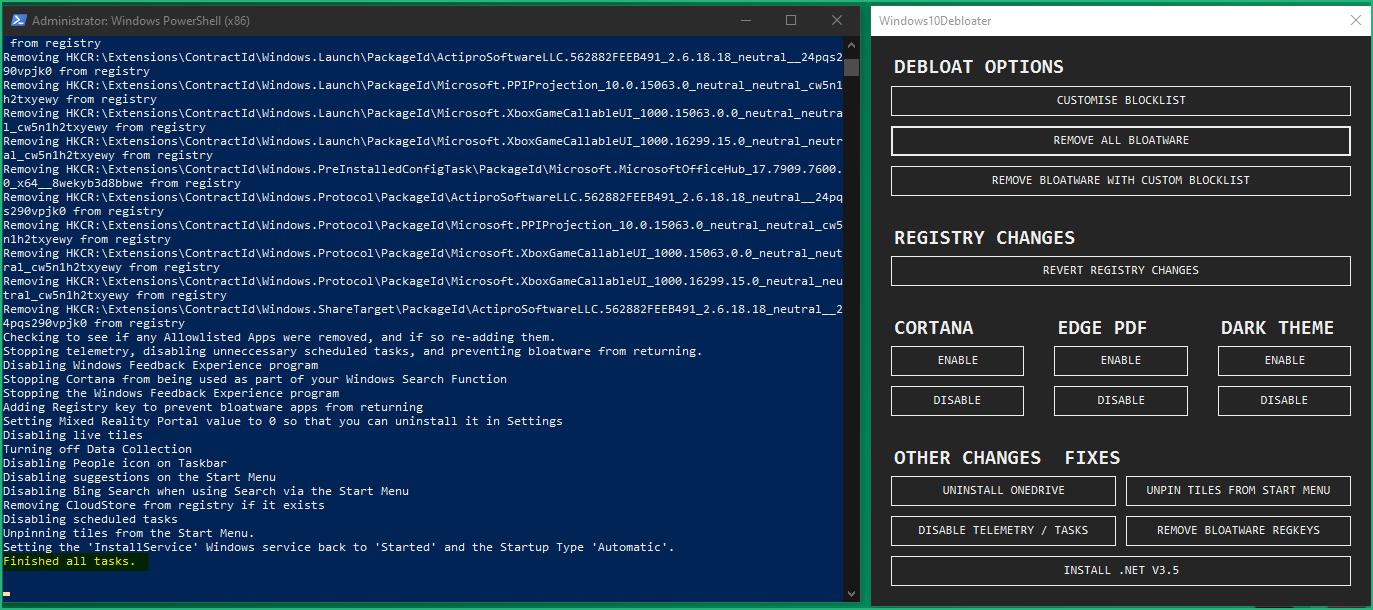
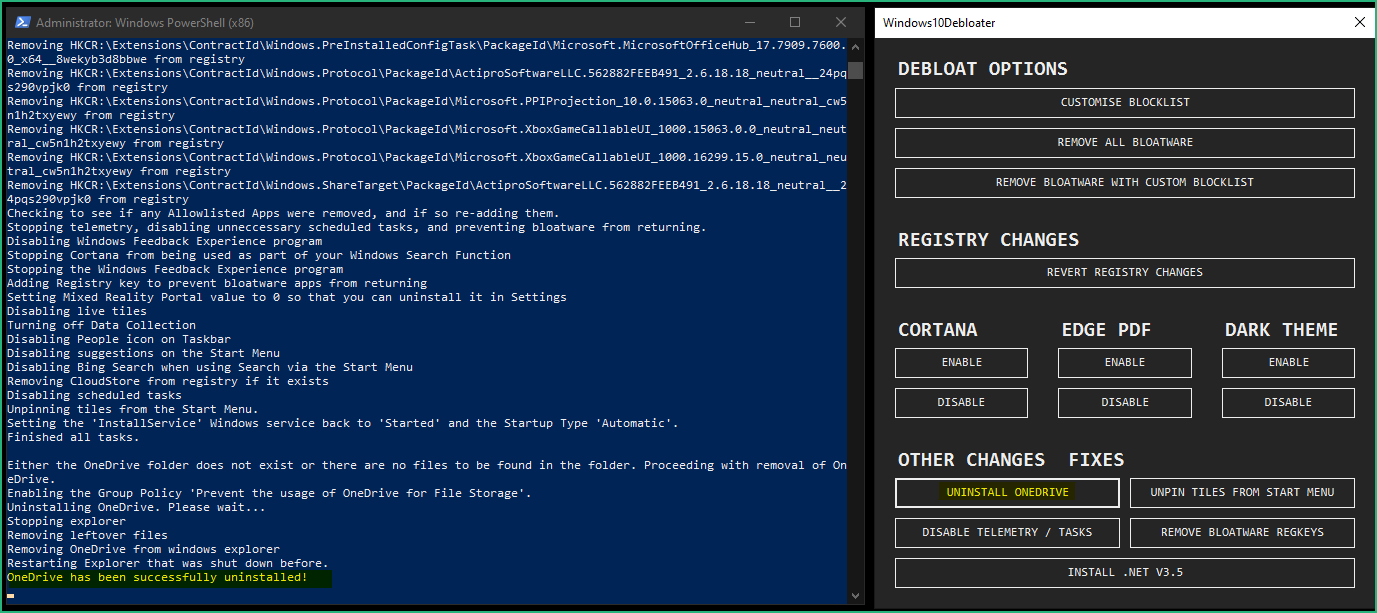
A good idea is now to remove all the crap from Windows 10 (pre-installed unnecessary applications, stop some telemetry functions, stop Cortana from being used as your Search Index, disable unnecessary scheduled tasks, and more…). To do this we’ll use a PowerShell Tool called Windows10Debloater.
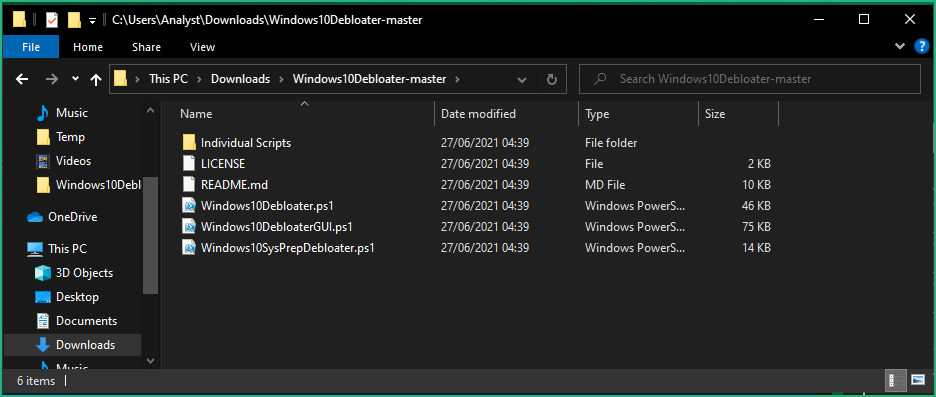
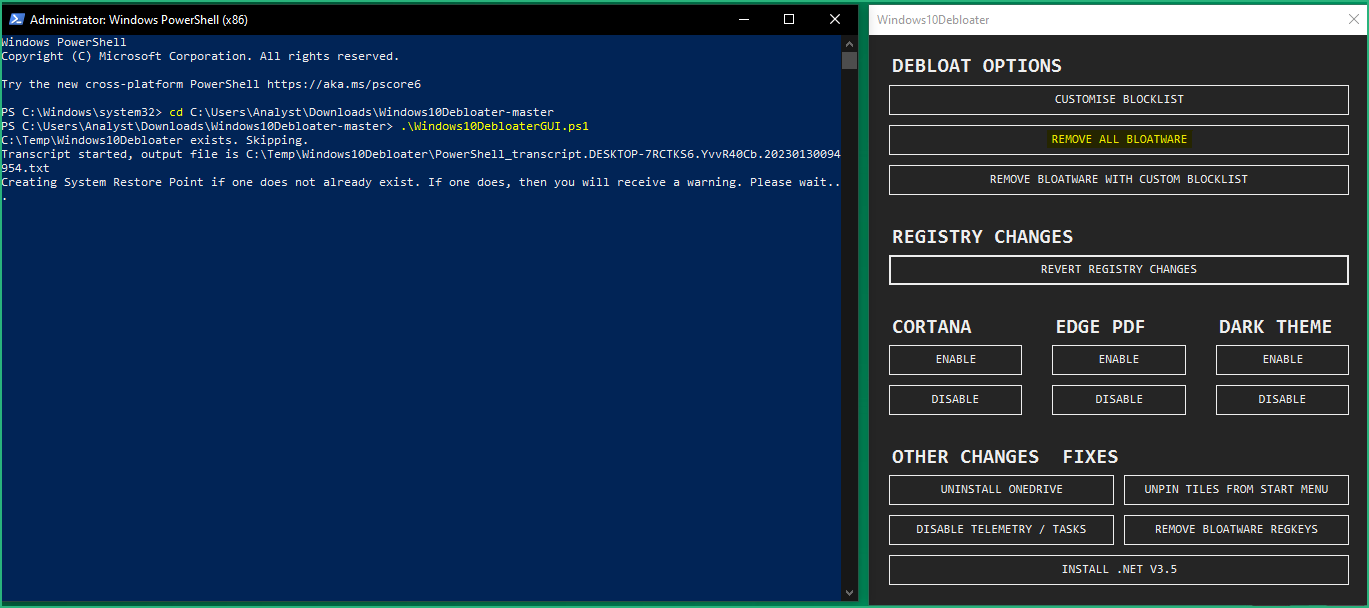
.\Windows10DebloaterGUI.ps1, then click on “REMOVE ALL BLOATWARE”
Our FlareVM is now ready to be used, the last step will be to configure the network to avoid it to reach Internet.
0x35 – Post Installation Network Config
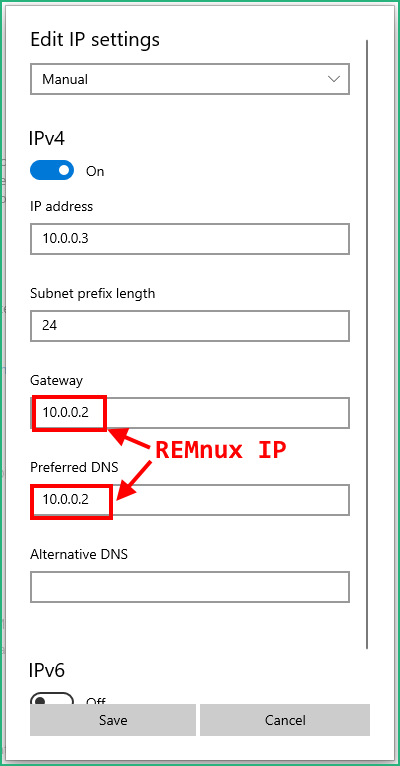
Now the FlareVM is up and running, we don’t want it to be connected to Internet anymore : put it back in the SandboxNet Virtual Network and restart it.
Now we’ll assign it a fixed IP (10.0.0.3) for example, and set the default route and the DNS server with the IP of the REMnux VM
On your REMnux VM, start inetsim to emulate network services (make sure to have edited the conf file as described).
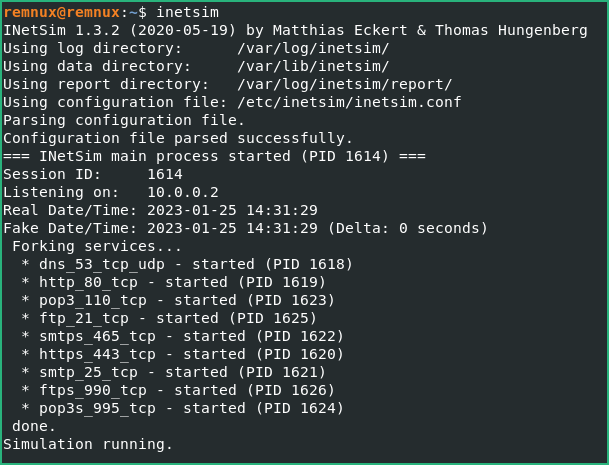
On your FlareVM, you can verify that the REMnux VM replies to DNS and HTTP queries.

This configuration will allow us to detonate (execute) some malwares and to observe their network behaviour from the REMnux with Wireshark for example.
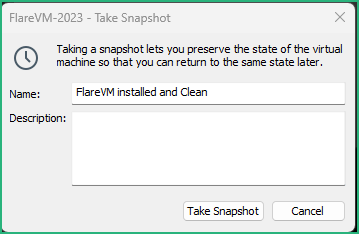
Last but most important, shutdown the VM and take a Snapshot :
0x40 – Final Words
It took me more time than expected to write this post but I tried to cover all steps in details. Most of experiences Malware Analysts will tell you this is the very basic setup, but if at least 1 person find this post useful, it’s a win !
I’ll try to keep this post up to date but things are moving so fast that I can’t guarantee anything.
Would you have any comment, feel free to use the box bellow. Enjoy !